Starting a Travel Blog (updated August 2017)
It’s the most popular question we get asked by our readers: ‘how do I start a travel blog?’ Well the good news is that it’s easy to set up a blog and we’ll show you how with this step by step guide on how to start a travel blog!
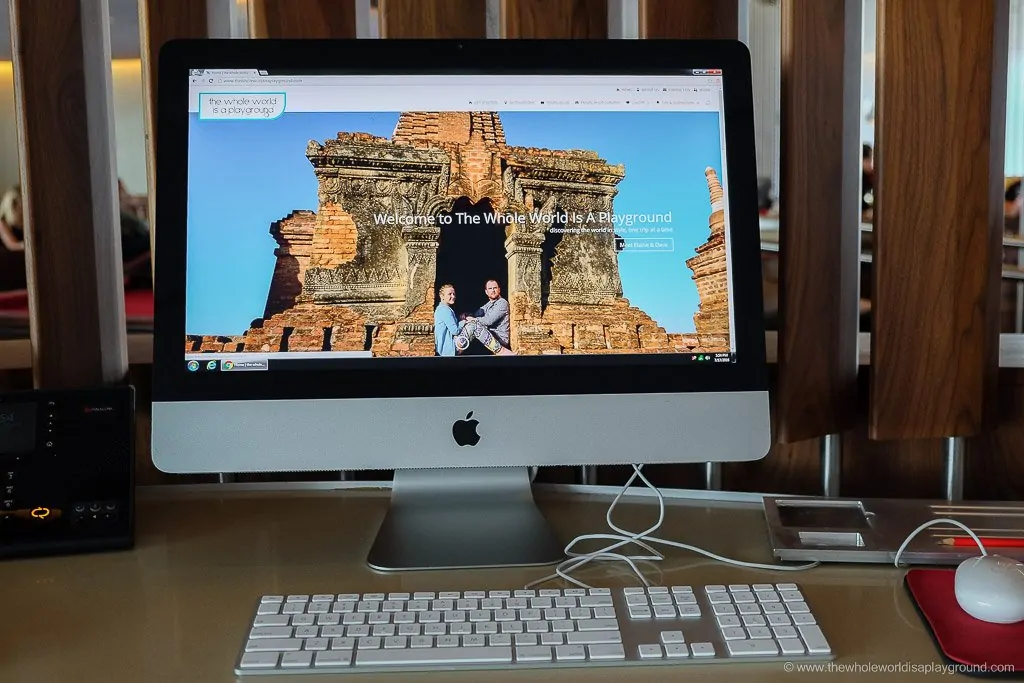
When we first launched The Whole World is a Playground we knew absolutely nothing about setting up a website, generating regular and engaging content, managing social media, growing an audience or working with brands. We started the blog in 2013 and had a readership consisting of just our two mums! Today our travel blog has an audience of over 1 million readers a year, we work with incredible international brands on many exciting travel adventures and the website is well on its way to generating a solid income. If starting a blog is on your mind then read on for our comprehensive guide to getting from an idea to writing your first blog post in less than 15 minutes!
We learned everything we know about setting up and running a blog on the job and we want to share what we’ve learned and what we wished we knew at the outset to help you set up your travel blog, start making money and travel more! This is is a step by step guide to starting a travel blog, including how to avoid some of the common pitfalls to avoid and tips for making your blog successful. We wrote it with our travel blog in mind but this will work for any type of blog.
Starting a website may seem daunting at first, but if you’re prepared to invest some time and energy into starting a travel blog you’ll be amazed at how simple and rewarding it is!
How to Start a Blog 101
Before we get into the details of how to start a blog you should know that it really only requires 3 basic steps:
1 | Choose your website name (a domain name)
2 | Purchase some hosting space with a hosting provider (this is where the backend of your site will live), we use Bluehost, lots more on this later!
Buy your hosting with Bluehost now!
3 | Start blogging. Simple!
With this guide we’ve also included a number of other steps which, based on our experience of running a successful travel blog, we recommend that you take some time to focus on when setting up a travel blog.
Let’s get started!
Our Step by Step Guide to Setting up a Travel Blog
Yay, you’ve decided you want to start a travel blog! First of all congratulations and welcome, you definitely won’t regret this decision! It is a lot of hard work but the places you’ll see, the fun you’ll have and the people you’ll meet will make all the hard work totally worth it.
Step 1 | Choose your niche
First things first, what do you want to write about? This may sound like a simple question but it’s one that can be difficult to answer when you start out. Your niche will decide what kind of people will visit your site, decide to follow you and become your audience. So the first hurdle is to decide on your target audience and what you think they’d like to read about.
There’s something you show know: there are lots of travel blogs online so you need to stand out and find your own angle. For us it’s luxury adventure travel: we travel the world in style, we travel often and we have a million fun adventures along the way. In turn our readers enjoy seeing where we go and the things we do and it inspires and helps them to do the same. It’s that simple!
Every travel blog audience is different, you just need to figure out what story you want to send to your readers.
Step 2 | Choose a name for your blog
Now for a really fun part: choosing a name for your blog! Don’t rush this part and trust us when we say it is really, really important and worth taking the time to choose one that works for you. Run it by your family and friends to make sure it appeals to an audience and sends a positive message.
Top tips for choosing a good name:
- It needs to be memorable: make it catchy, make it intriguing, make it fun. You want people to remember your blog name and return to it time and time again.
- Make it relevant to your niche: this will help brands and readers recognise what you do. Popular niches include luxury travel, backpacking, solo travel and adventure.
- Keep it short: a short name you say, that’s funny coming from a pair with the longest website name ever! We’ve learned that a short and snappy name will make a lot of things easier for things like the length of your website address, designing business cards and logos and choosing social media handles. We love The Whole World is a Playground but a shorter name would would have helped!
- Avoid numbers and special characters: Make it as easy as possible for people to find and get to your website and using the proper spelling of words without any special characters is fundamental to this. Things like hyphens and numbers should be avoided.
- Ensure it represents your brand: your blog name will become your brand so it should embody the travel lifestyle that you have and want to inspire your followers to have. A professional name will also help you when it comes to working with brands in the future.
Setting up a Travel Blog pro tip: To make sure your chosen name has staying power don’t choose a name that could become obsolete with a change in circumstances. The www.the25yearoldsolobackpacker.com might be perfect now but what happens when you turn 26, meet someone and want to ditch that backpack? Now you see what we mean!
Step 3 | Buy your domain name and hosting package
Once you’ve chosen your blog name it’s time to buy your domain name and hosting package. No idea what a domain name and hosting package are? That’s ok, we’re just about to fill you in!
Hosting: every website on the internet has to be hosted by a hosting company who provide a hosting package where the software and files which run your blog live. It’s kind of like renting space on the internet to hold your website!
There are a few hosting companies on the market and you need one that is reasonably priced, reliable and can help you out when you’re in a website fix. We’ve used Bluehost since we launched 3 years ago and highly recommend them for anyone starting a travel blog. Bluehost is the world’s most popular hosting company for good reason: it’s relatively cheap (like $3 or $4/month cheap), simple to use and has excellent support.
We chose Bluehost initially as it was a breeze to setup the website. It takes about 15 minutes to go from zero to writing your first blog post.
Domain name: a domain name is the website address where people can find your site online. So for us our domain name is www.thewholeworldisaplayground.com. Bluehost include the registration of your domain for free so you don’t need to worry about any extra costs.
Click here for the best Bluehost prices
We’ have personally hosted our site with Bluehost over 3 years, so we’ve first hand experience with them and still recommend them to our readers, for the following reasons:
Bluehost are cheap and good. That’s a great combination! Where else are you going to get to your website online for less than the price of a cup of coffee?
If you do run into problems (and we all do) their 24 hour webchat is invaluable. They usually respond within a few minutes and help fix the issue.
Websites grow and changing host requires lots of work or lots of money. With Bluehost it’s possible to scale up and upgrade a hosting package. We began with a starter package and upgraded as our audience grew. We’re now on a more powerful Cloud package. The upgrades take a few minutes and Bluehost do all the work.
The back-end tools and dashboard are very user friendly and, combined with their technical support, it takes very little effort on our part to run the website.
Step by Step Bluehost Instructions
Setting up a host can be a daunting task but it only takes a few minutes if you follow these step by step Bluehost instructions:
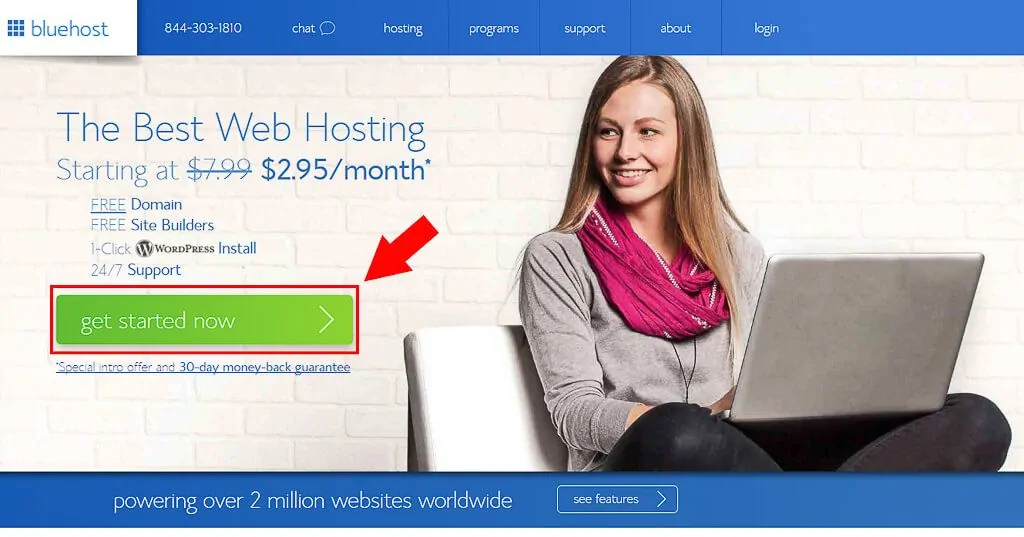
3.1 | Go to the Bluehost website
On the Bluehost website click on the green button ‘get started now’.
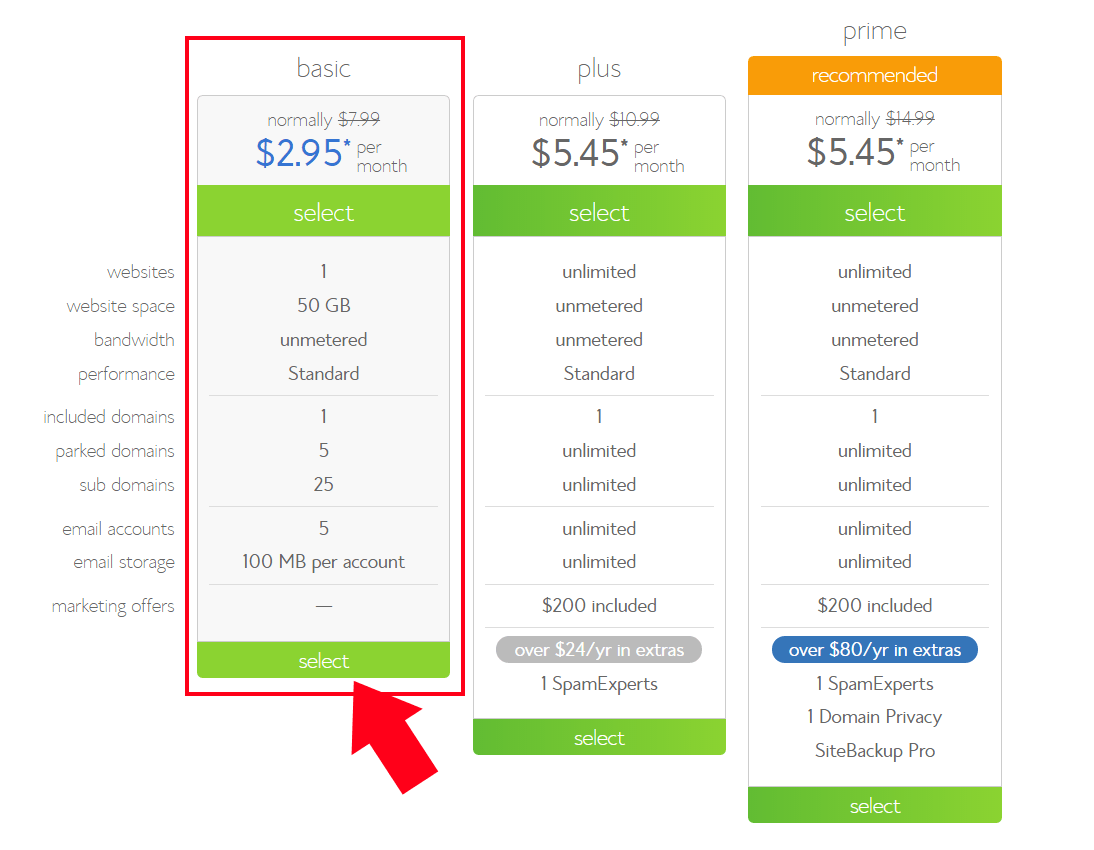
3.2 Choose your hosting package
We recommend the basic package as it’s the cheapest option and exactly what you need when starting out.
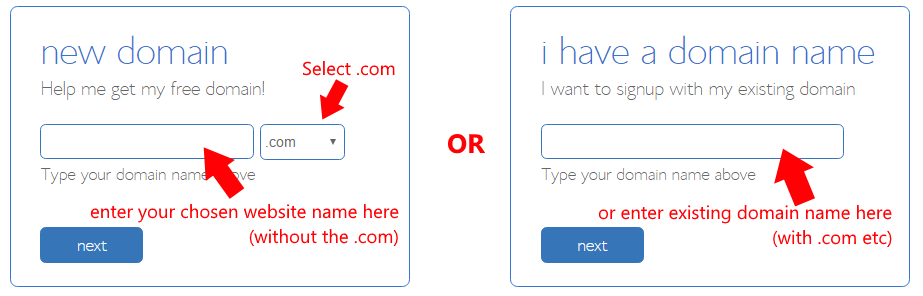
3.3 Reserve your domain name
Pro Tip: Generally the preference is to purchase a .com domain address. Remember you want to attract visitors from all around the globe so a local domain name address (.ie, .co.uk) may not translate well internationally.
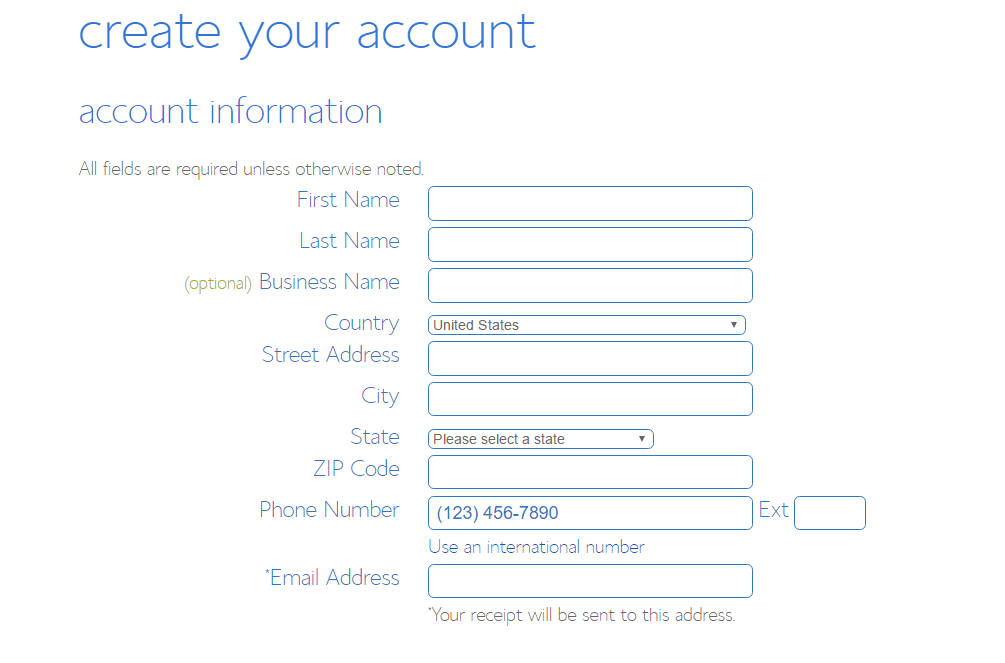
3.4 Create your Bluehost account
3.5 Choose your package type and add-ons
We recommend buying a the maximum number of years hosting up front at this stage, i.e. 36 months as you will get a great offer when first purchasing your hosting, usually with a lot of discount. If you have to renew in 6 months time you likely won’t get those deals and the hosting costs per month will increase at renewal.
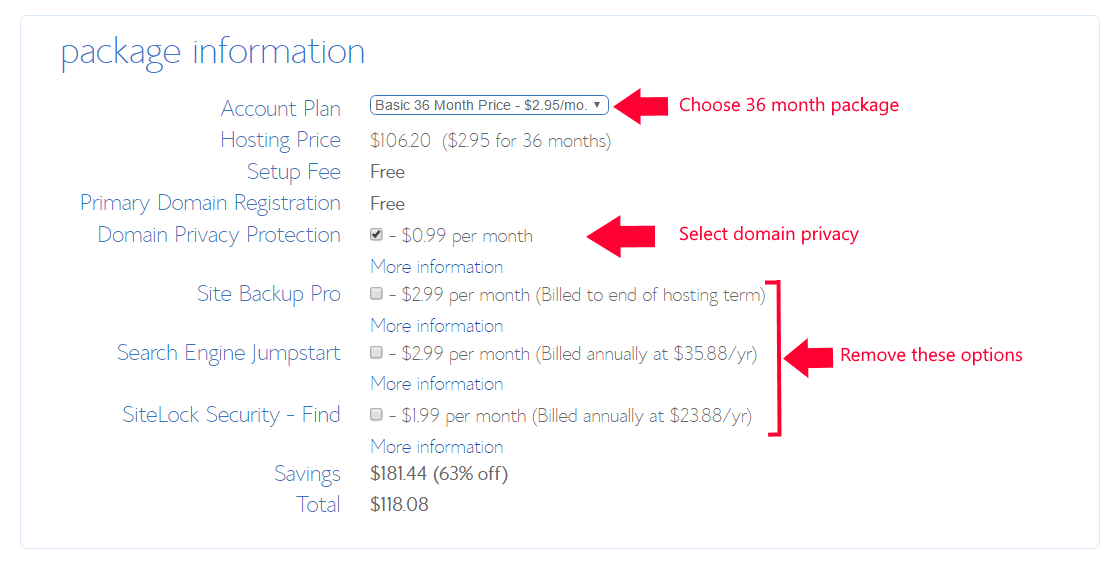
We don’t recommend paying for extra Site Backup Pro (we’ll talk about backup plugins later), Search Engine Jumpstart or SiteLock Security. We do recommend that you purchase domain privacy.
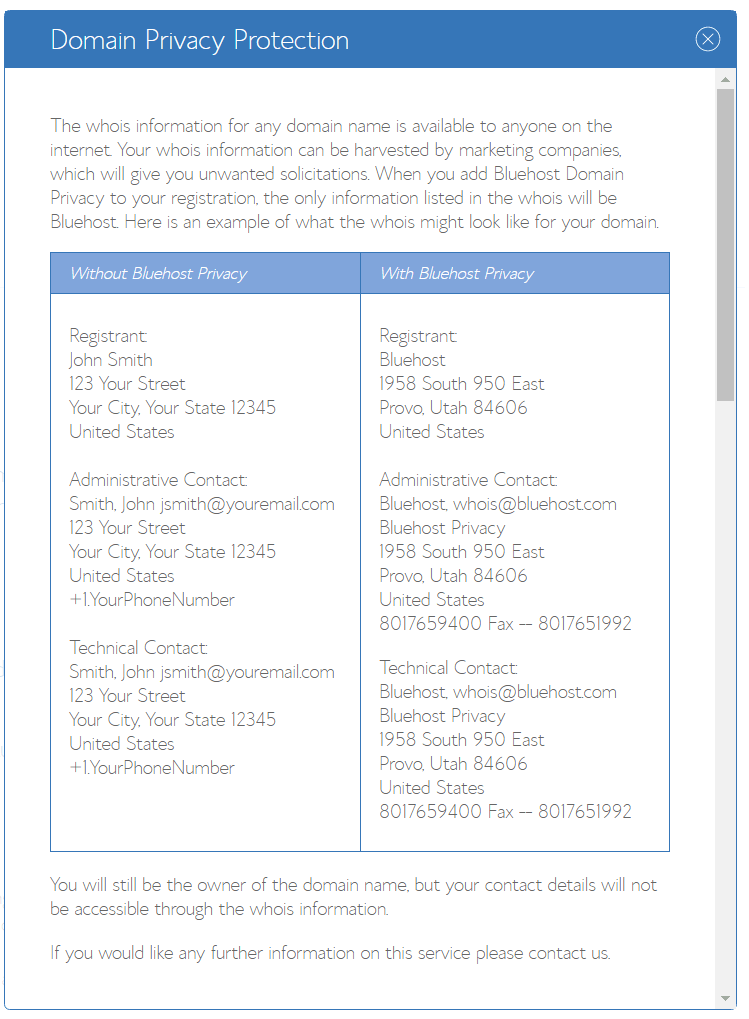
Setting up a Travel Blog pro tip: when you register your domain name your personal contact details will be entered in a publicly available registry. We purchased domain privacy when registering our domain to ensure that our private contact details (name, home address and phone number) are not shared in the public domain registry. Although it is an extra cost we wanted to protect our identity.
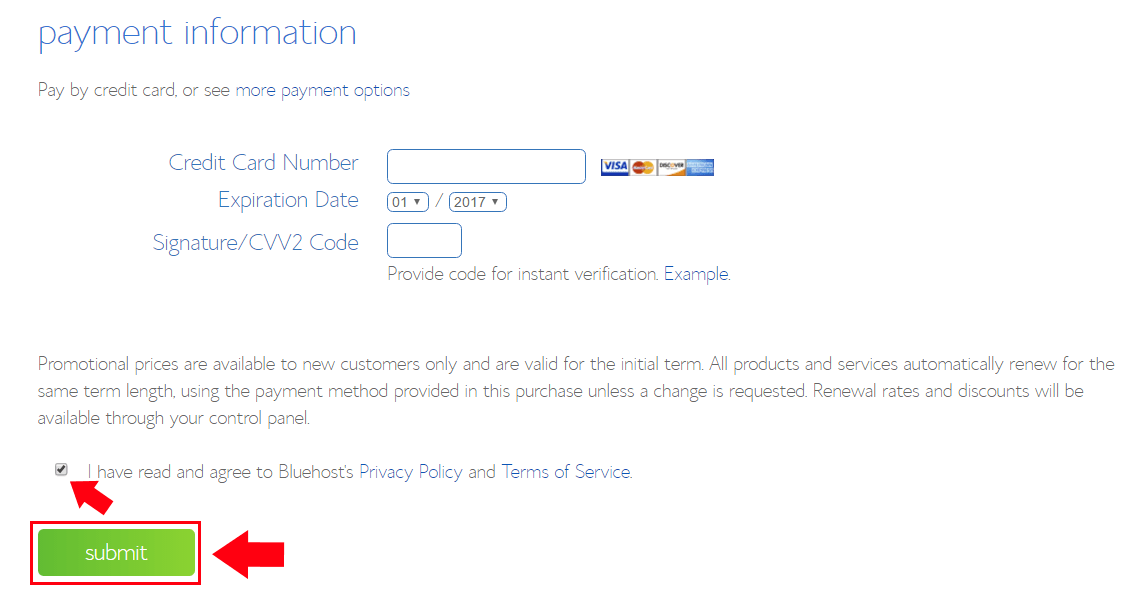
3.6 Confirm payment and purchase your domain and hosting
Step 4 | Install WordPress
So you have a domain name and the hosting package is sorted. Now it’s time to get blogging!
In order to start blogging you need a platform to manage your content and this is where the WordPress comes in. WordPress is the worlds most popular Content Management System and most blogs are set up on a WordPress platform. It’s frequently updated for security, is extremely well documented, has lots of customisation options and, best of all, it’s free!
Setting up a Travel Blog pro tip: set up your blog on wordpress.org rather than wordpress.com as you’ll need a .org site to take advantage of a lot of the best WordPress features whereas .com has a lot of limitimations. A .org site is also needed for when you want to make money: it allows you to run your own advertisements, include affiliate links and publish sponsored content.
Installing WordPress on Bluehost is a breeze. With their automatic installer it only takes a few clicks.
1. Log into your Bluehost account
Log into Bluehost with the username and password which you setup previously: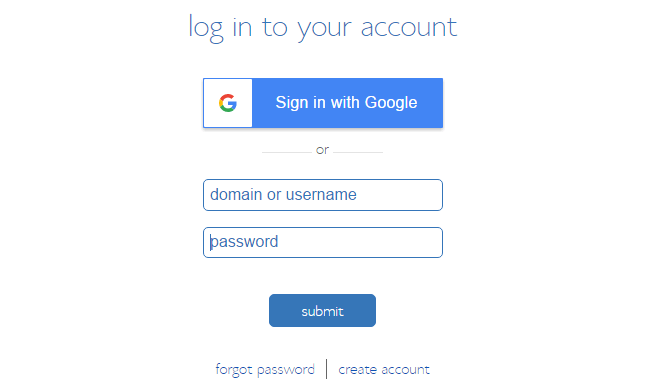
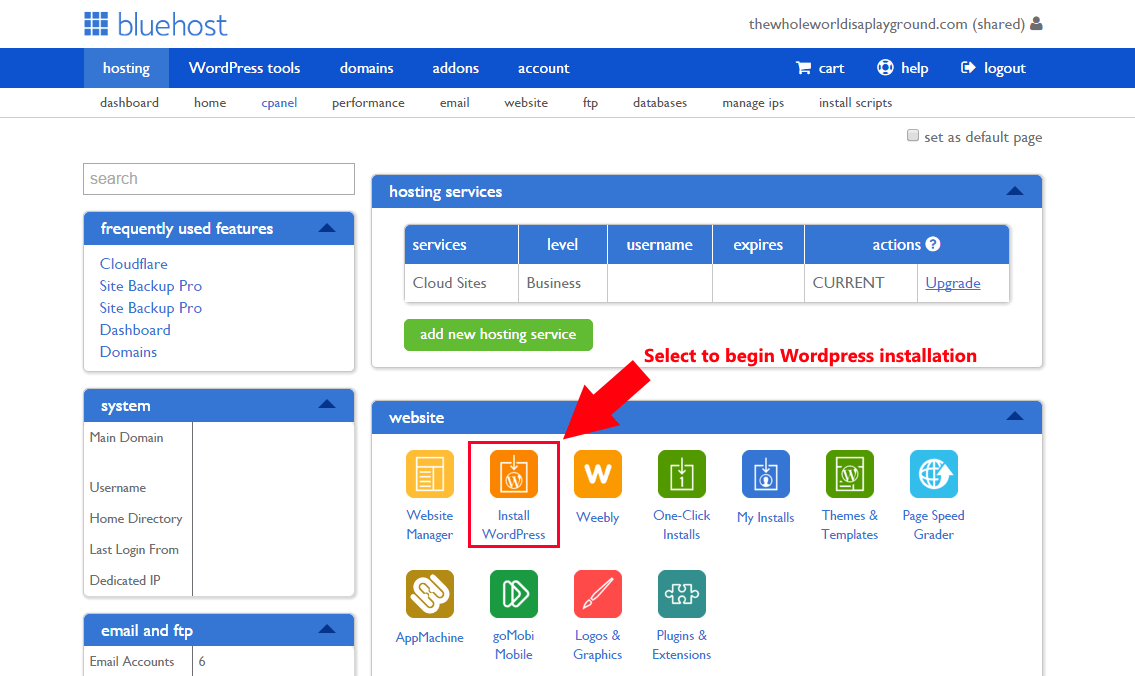
2. Click on ‘Install WordPress’
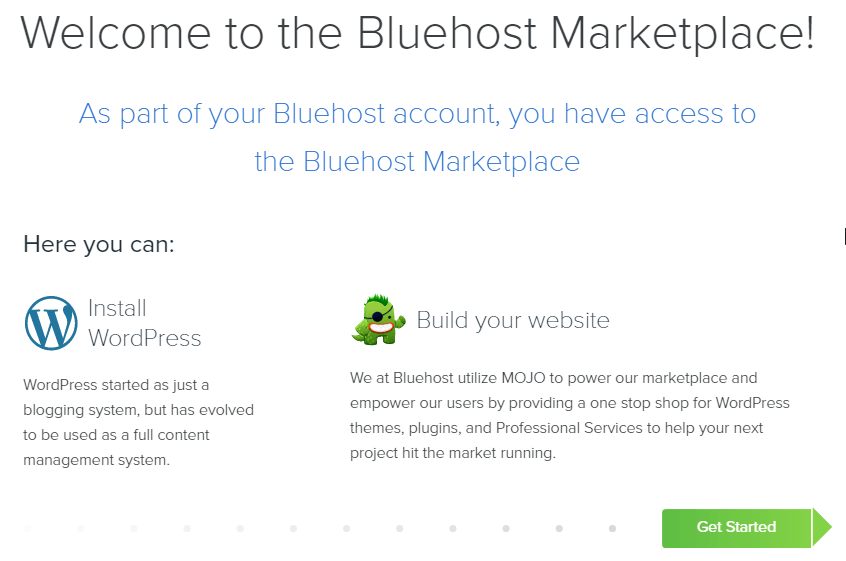
3. Continue install
Click next to continue with the install. We install WordPress only. We don’t use the MOJO marketplace as we prefer to have total control over the site and know how each part of the site works in case something goes wrong.
4. Select install location
Next choose the domain where you’ll be installing wordpress. Your domain will be listed in the domain box dropdown. Leave the directory blank and hit the next button.
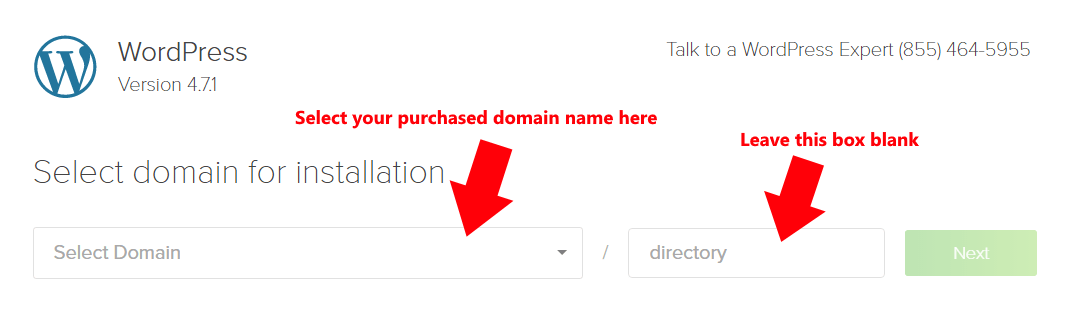
There will be some options for plugins and professional help with the install. We don’t use any of these and recommend you uncheck these boxes.

5. Set WordPress blog name and log in credentials
This step is very important. Here you will specify the website name and WordPress login credentials for the administrator i.e. you. This will serve as the admin account where you will log in to setup the WordPress website and do general housekeeping.
IMPORTANT: The information you enter here is very important so make sure to note it all down somewhere safe. If you can’t remember your WordPress admin username or password it will make accessing WordPress very difficult.

1. Site name: the name of the website e.g. The Travel Blog
2. Admin Username: choose a username that you will use to log into the WordPress dashboard of your new website
3. Admin Email: set this as the email address that you already use for emails
4. Admin password: choose a password that you will use to log into the WordPress dashboard
Once you’ve completed the cells and noted the admin username and password for later click Install.
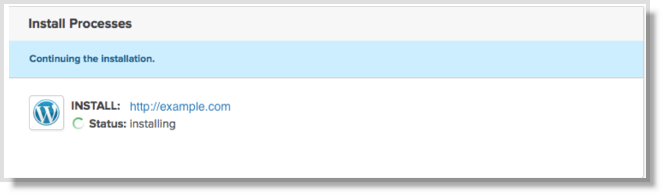
6. WordPress will now install on your hosting account
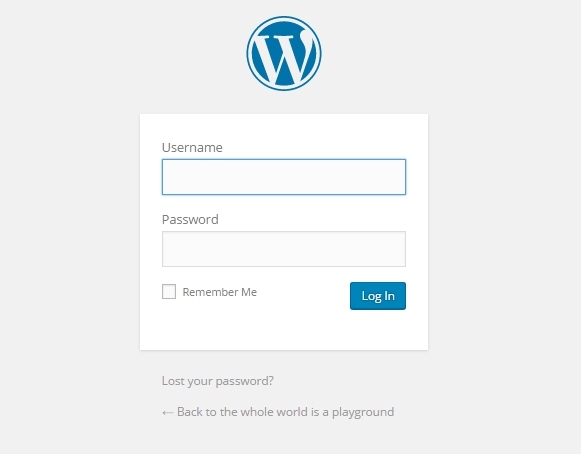
Once the install is complete you can now log into your new WordPress blog! In your browser navigate to www.yourwebsitename.com/wp-admin The “wp-admin” page is where you log into the WordPress dashboard.
Step 5 | WordPress Dashboard
Once WordPress has finished installing it’s time to log into your blog for the first time and write your first blog post! In your browser navigate to www.yourwebsitename.com/wp-admin and log in using the Admin username and Admin password which you setup in Step 5:
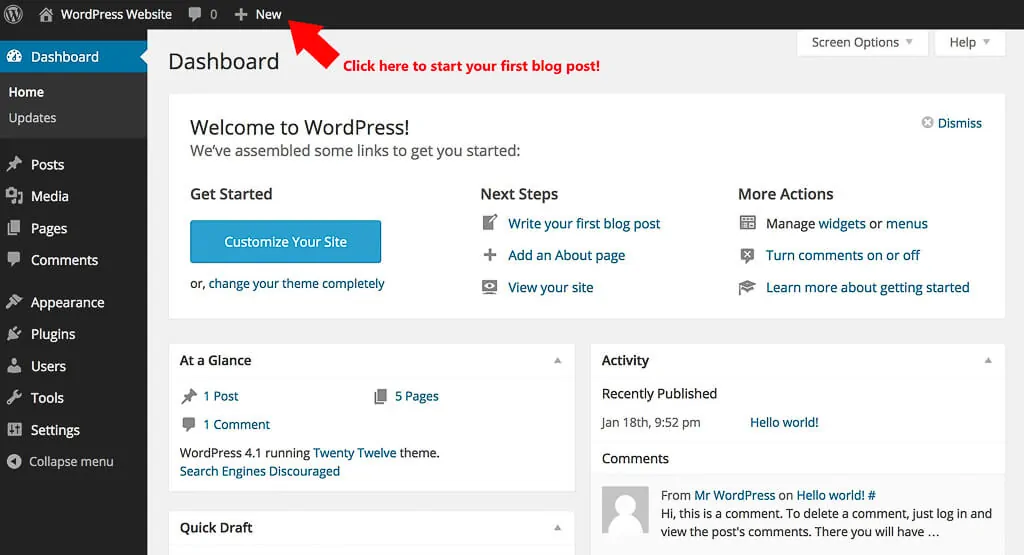
The WordPress Dashboard
Once you’ve successfully logged in you’ll find yourself at the WordPress dashboard and ready for your first blog post. Result!
Step 6 | Choose WordPress Theme
What is a WordPress theme we hear you say! Themes are the back end to the beautiful website designs you see across your fellow bloggers websites. Themes do all the hard design work behind the scenes and result in a snazzy website design for you!
1. Draw a mockup of your site and prepare a wishlist
Before deciding on a WordPress theme it is best to decide what you want your blog to look like. Designing a wishlist of what you want the blog to look like will make choosing a theme much easier.
We cannot emphasise the importance of drawing mockups of what you want each page to look like as this will help you ensure that a potential theme does exactly what you want it to. It’s better to know this now! The standard pages for a travel blog are:
- Homepage
- Destinations page
- About page
- Blogposts
Use other travel blogs and websites for inspiration on this part. Decide what you like / don’t like and build up your requirements for the WordPress theme.
2. Choose a theme – buy one that meets your needs!
Now you broadly know what you want your blog to look like and the features it needs to have it’s time to choose a theme. There are literally thousands of WordPress themes, free and paid, available online so choosing one is not an easy task. Your mock up and wishlist will make this process a lot easier.
Free or Paid WordPress Theme
We initially started with a free WordPress theme. We had no complaints and it served its purpose for a time. However, when we grew out of the basic functionality and had to upgrade to a new theme the process was time consuming and painfully hard work. So our advice is to take the time to choose a professional theme at the start and invest the time and energy in choosing a great professional theme that you will be able to stay with it for years.
After a lot of research we chose the premium Divi theme by ElegantThemes. Divi is one of the next generation of WordPress Themes with a very easy to use, advanced theme builder that allows users to create a stunning blog design. It has simple drag and drop interface that integrates really well with WordPress and takes care of a lot of the back-end coding. A premium theme is not essential but something to consider if you have a long term goal.
Click here for the best Divi theme prices
Step 7 | Our recommended WordPress Plugins
WordPress plugins are add-ons that can be installed within WordPress and which give new features and added functionality to your website. There are thousands of really good plugins available but the key is to minimise the number of plugins within your site. Plugin’s can slow down the operation of the site and some may even conflict with each other causing things to break so always do research before installing a new plugin. Look especially for conflicts with common WordPress themes or other plugins in the reviews.
We use the following free plugins and consider them essential:
- Caching plugin: W3 Total Cache will improve the performance of your blog and speed up the website for your visitors
- SEO: Yoast SEO SEO (Search Engine Optimisation) allows you to make your blog Google friendly and appear at the top of search results meaning lots of website traffic!
- Spam blocker: Akismet protects from spam comments and contact form spam.
We also purchased this backup plugin but there is a free version which is fine as an alternative we just couldn’t get it to work for us.
- Backup: Vaultpress is a backup plugin. It is essential to have a back up so if anything goes wrong with your website you can just restore it to a working version.
Step 8 | Register your social media accounts
You want everyone to know about your website and all the great articles you are publishing right? This is where social media comes in. Register a name consistent with your blog name and try and keep it the same across all social media channels that you intend to use.
Setting up a Travel Blog pro tip: it’s important to register on any social network that you may use in the future. The main channels for travel blogging are Facebook, Instagram, Twitter, Pinterest and Youtube. Then there’s Snapchat, Bloglovin, Flipboard… Even if you don’t plan on using these channels register your account name as you never know when you might decide to start using it.This avoids issues of your name been taken.
You’re all set!
Now you’re all set to blaze a trail in the travel blogging world! Go get ’em! If you have any questions, send us a message via our Contact Us page and we’ll do our best to help a fellow blogger out!
Disclosure Notice: Please note that some of the links above are affiliate links. This means that we earn a commission if you purchase any of the items via our site but you pay the same price either way. We personally use all of the products/services listed above and only recommend them because we’ve used them for our own travel blog. Using the links in the website is a great support to us so please keep on clicking!